In this blog, we will explain that how to change session TTL a firewall policy, as it is sometimes required.
Symptoms
This problem occurs when an application server is in a different VLAN / DMZ and the user tries to access an application such as SAP, Tally, QuickBooks, residing in other VLANs, or tries to access the applications over the VPN. And, after using the services it shows “timed out”.
Configuration–
Follow the below step to change the session-ttl for the firewall policy.
Steps–
1. Log in to Fortigate firewall by using the login credential.
2. Go to the Policy & Object menu section and select the option Firewall Policy.
Download Our Services Brochure
3. In upper-left corner, click on “By Sequence” to show the policy ID.

4. Now find Policy ID that you want to change.

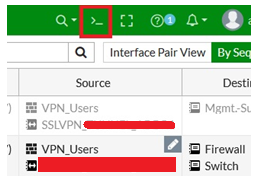
5. Now, switch to the CLI mode because we can’t change the TTL session time in GUI mode. Policy ID may differ, as in my case, the policy ID is 46.

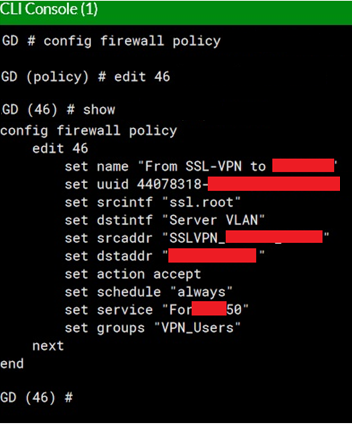
6. To check the current configuration of the firewall policy, run the below command.
config firewall policy
edit <Policy ID>
Show
As we can see that TTL session is not configured.

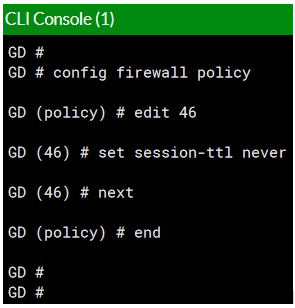
7. Run the below command to change the TTL session time for the selected firewall policy. In my case, we are going to set the TTL session for never timeout.
config firewall policy
edit <policy ID>
set session-ttl never
next
end

Note- Don’t forget the run the next and end command.
8. Now, the TTL time session has been changed as needed.
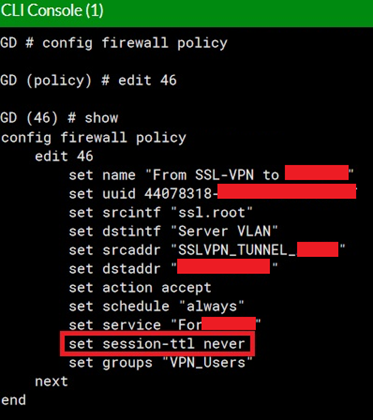
9. To confirm this, run the below command.
Config firewall policybr>
edit <policy ID>
show

Now, you can see that the session-ttl has been set to “never”.


