Overview
vCenter is Linux-based virtual machine customized on running the vCenter, Server. vCenter is a management server which manages VMs in a virtual environment.
Why to Select vCenter Server Appliance (VCSA) instead of Windows vCenter

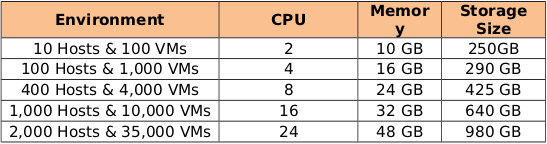
Default System Requirement-
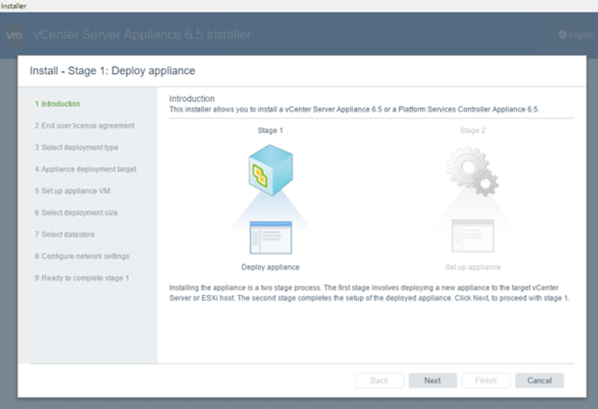
Stage-1:
Installation of vCenter Server Appliance (VCSA).
1) Download the vCenter ISO image from Vmware website. <br>
2) Mount the ISO on physical/virtual machine from where ESXi host must be reachable. <br>
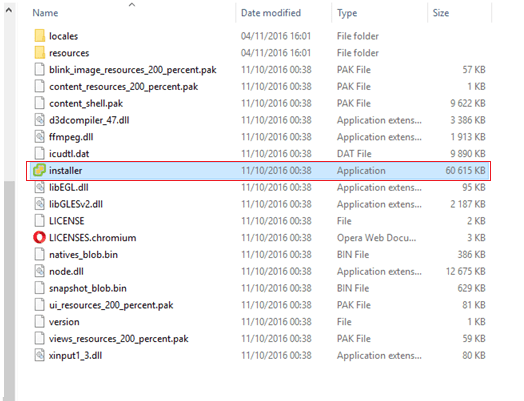
3) Launch the GUI installer from path <CD drive>\vcsa-ui-installer\win32.
4) Launching the installer will invoke the below mentioned options.
Install- Select this option to install vCenter server appliance.
Upgrade- Select this option to upgrade vCenter server appliance to a higher version.
Migrate-Select this option to migrate windows vCenter server to vCenter server appliance.
Restore- Select this to recover the vCenter server appliance.
5) Select the option Install.

6) Select Deploy appliance, click Next.
7) Tick the mark on, I accept the terms of the license agreement, click Next.
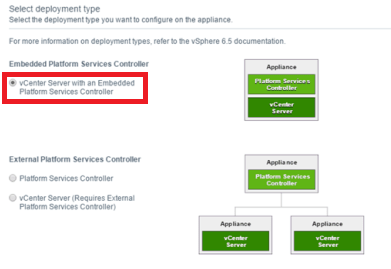
8) Select Embedded Platform Services Controller, click Next.
9) In the next screen, put the details and click Next.
ESXi or the vCenter Server appliance name
Mention IP of the ESXi server which will host vCenter.
HTTPS Port (default 443)
Port on which ESXi web management is running.
User name
Mention ESXi login credential.
Password.
Mention ESXi login credential.
10) In the next screen, put the details and click Next.
Mention the VM Name.
Put desire name for VCSA.
Root password.
Put the desired password for the VM.
Confirm the root password
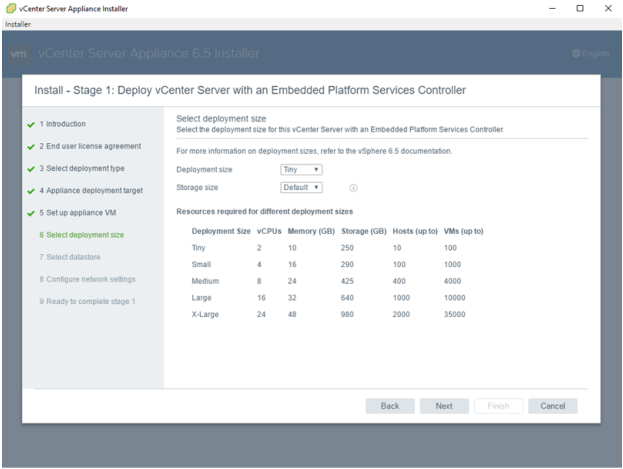
11) Select the appliance size, click Next.
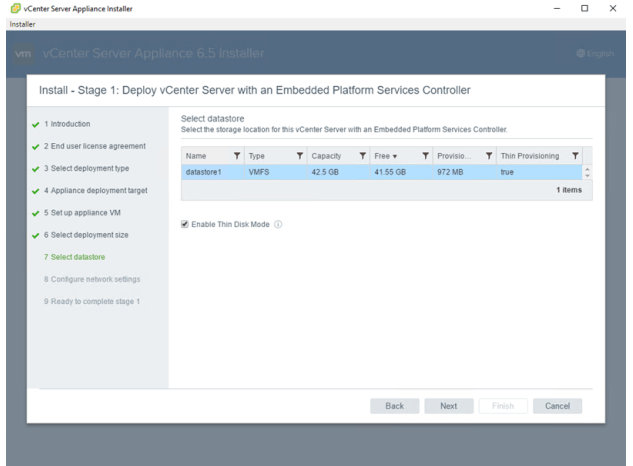
12) Select the datastore where the VM will be deployed, check the mark Enable Thin Disk Mode and click Next.
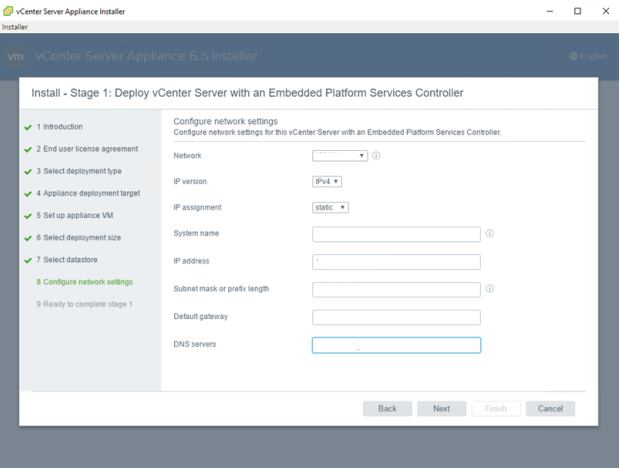
13) Put the network configuration of vCenter server appliance, click Next.
Network
Select the desired network for the VCSA server.
IP Version
Select IPv4.
IP Assignment
Select static.
System
Put the system name.
System name
Put the relevant name.
IP address
Put the desired IP from above selected network.
Subnet mask or prefix length
Put the subnet mask of the selected network.
Default gateway
Put the default gateway of network.
DNS servers
Put the DNS server IPs separated by (comma).
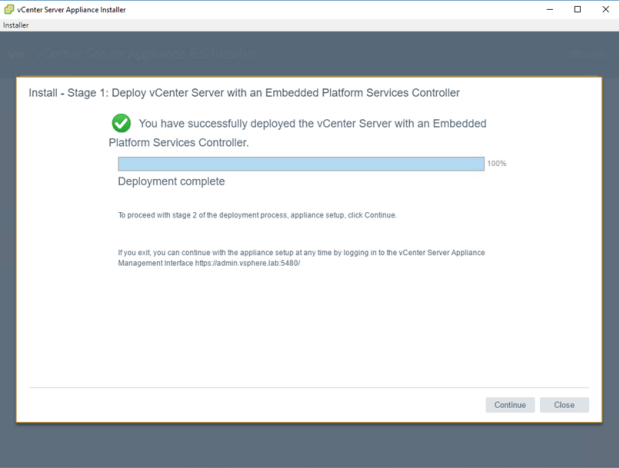
14) To deploy vCenter appliance, review your configuration and click Finish.
15) Deployment progress bar will appear on the next screen.
16) Stage-1 will be finished after successful deployment.
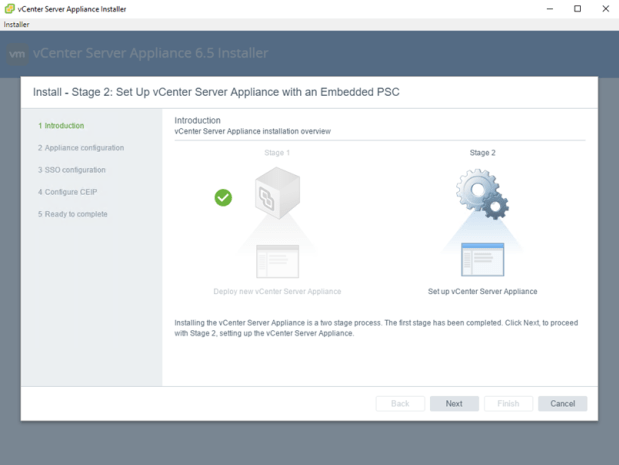
Now Step-2:
Configure the vCenter server appliance (VCSA).
17) Click on Next.
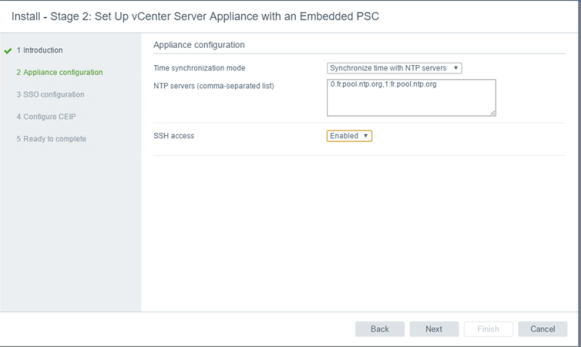
18) Synchronize the time,
Time synchronization mode
Synchronize time with NTP servers Click Next.
NTP server
Put internal/external NTP server IP or name separated by (comma).
SSH access
Enabled (if you are planning to deploy in HA mode).
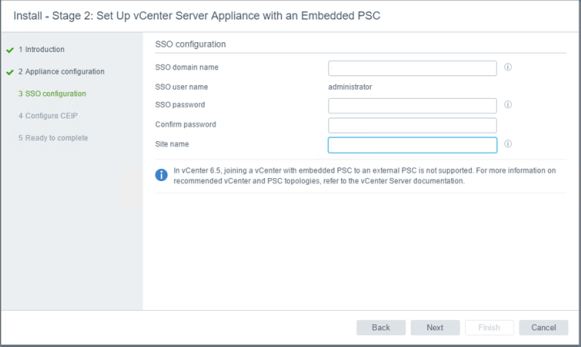
19) To create a single Sign-On (SSO) configuration, put the SSO domain name, user name, password and confirm the password and site name, click Next.
SSO domain name.
Put any domain name (it should not be your active directory domain name).
SSO user name.
It will be default administrator
SSO password.
Put the strong password.
Confirm password.
Site name.
Put desired site to host the cluster and the host.
20) You may select Join the VMware’s customer Experience Important Program (CEIP) and click Next.
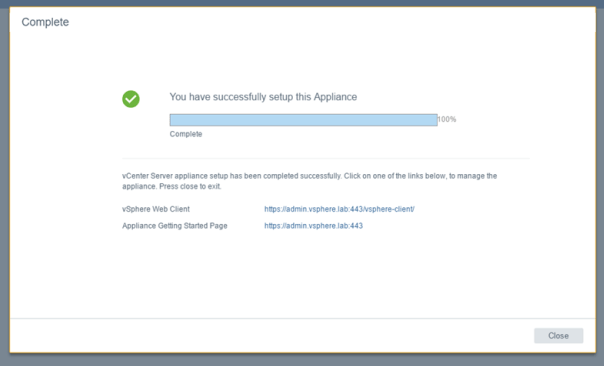
21) Review the configuration, click on Finish.
22) Setup is completed once the progress bar reaches 100%.


good blog
It’s beautiful worth sufficient for me. In my view, if all website owners and bloggers made excellent content material as you probably did, the net will likely be a lot more helpful than ever before.
Greetings! Very useful advice within this article!
I really like what you guys are up too. Such clever work and exposure! Keep up the terrific works guys to share informative content. Thank you.
Hi there! This article couldn’t be written any better!
magnificent points altogether, Thank you guys.
It’s the best time to make some plans for the future and it is time to be happy.