In this blog we are showing, how to create CDN in Google Cloud services. Cloud CDN supports current protocols originally developed at Google, like HTTP/2 and QUIC, to improve site performance for mobile users and/or users in emerging market. Currently Google CDN only works with load balancer.
Limitation for Google CDN –
1. CDN is applicable only for application/s which is hosted on Google Cloud Platform.
2. CDN works for http and https protocol.
3. CDN only works with load balancer.
4. Load balancer can be created for single instance or multiple VM instances in same or different zones.
Prerequisite –
1. At least one VM instance running on Google Cloud.
2. Web application should be running on the VM instance on port 80/443.
Steps to create CDN-
1. Login to GCP Console.
https://console.cloud.google.com
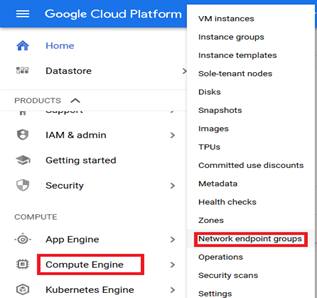
2. Click on Navigation Menu.
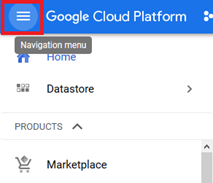
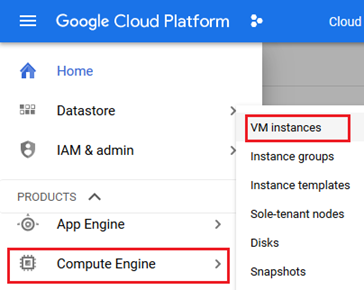
3. Click on Compute Engine and select VM instances
4. Click on VM instance name.

5. Click on EDIT and select Network interfaces
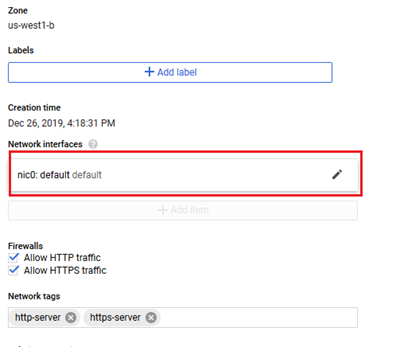
6. Put the Name of IP and click on RESERVE.

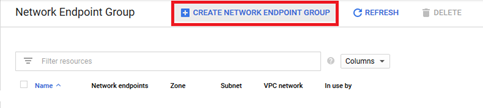
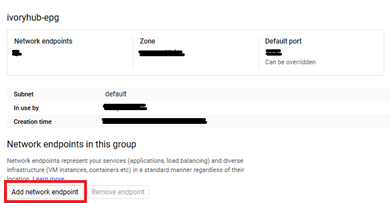
7. Now click on Navigation Menu > Compute Engine > Network endpoint groups.
8. Click on CREATE NETWORK ENDPOINT GROUP.
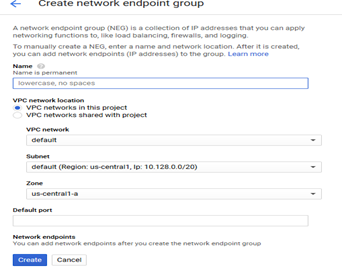
9. On next screen put in the details
• Name – Desired name of network endpoint group name
• VPC network location – select the VPC network location which has the required network subnet.
• VPC network – Select the network which contain the required network subnet.
• Subnet – Select the required network subnet.
• Zone – Select the zone which has the required subnet.
• Default port – Mention the port of the application (443 or 80).
And click on Create.
10. On next screen edit the Network Endpoint Group by clicking on it.
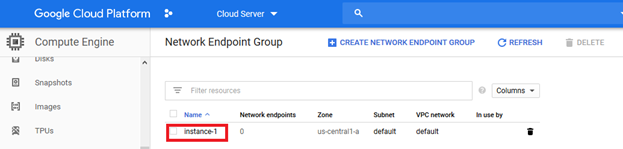
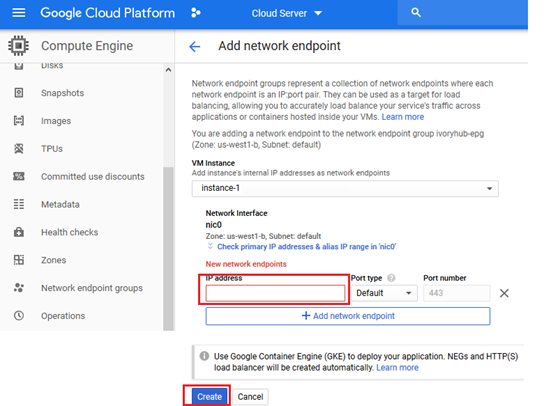
11. Now add Network Endpoint by clicking on Add network endpoint.
12. Put the IP of VM instance and click on create.
13. After successful addition you will get instance listed at the bottom with green health status.
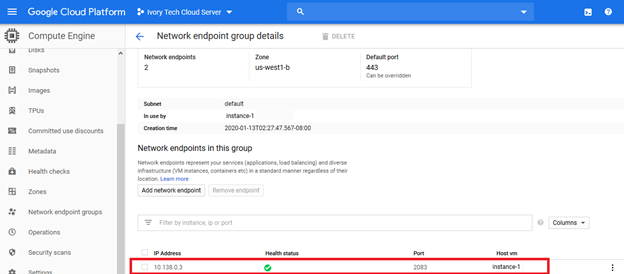
Note: Health status will take some time to turn green.
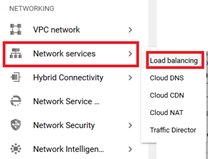
14. Click on Navigation Menu > Network Services > Load balancing
15. Click on Create Load balancer.

16. Select HTTP (S) Load Balancing and click on Start configuration.
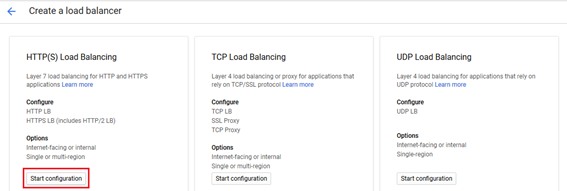
17. Select from Internet to my VMs and click on continue.

18. Put the name of name of load balancing.
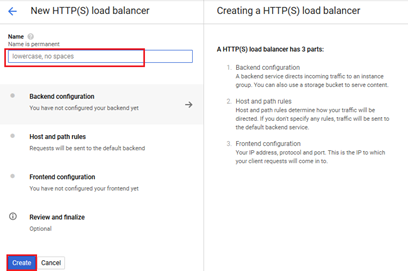
19. Select Backend configuration > Backend services > Create a backend services.

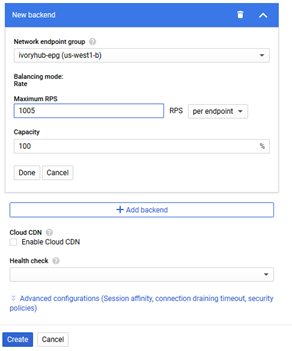
20. Put the name of backend service > select the Protocol > select backend type > select the backed reason > select network endpoint group > Balancing mode > Capacity > Enable the Cloud CDN > Select the health check and click on create.
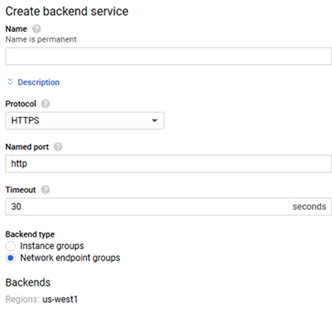
Note: We select Network endpoint group in backed type as we created a Network endpoint in above process.
21. Select the frontend configuration.
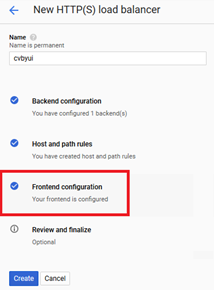
22. Click on frontend services and in the details.
• Name of Frontend service.
• Select the Protocol
• Select the Network Service Tier
• Select the IP address
• Select the Port and click on done.

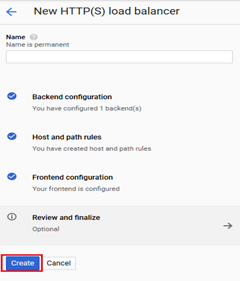
23. Click on review and finalize to recheck configuration before executing it.
24. Click on Create to run it finally.
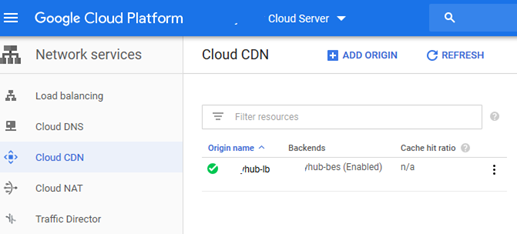
25. Load balancer created.
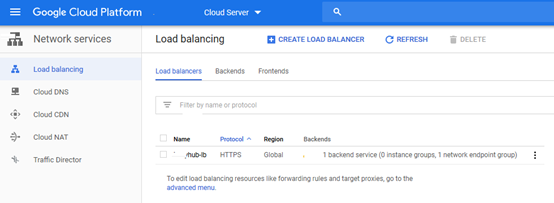
26. CDN also have been created.