
Here we are creating Microsoft Azure AD and connecting with in-house AD server.
Prerequisites –
1. There should be an on-premises AD server with same domain as Azure AD.
2. A Microsoft Azure subscription, if you don’t have created account on Microsoft Azure.
3. User account that’s a member of the Azure AD DC administrators group in your Azure AD tenant.
4. Routable domain required (abc.com).
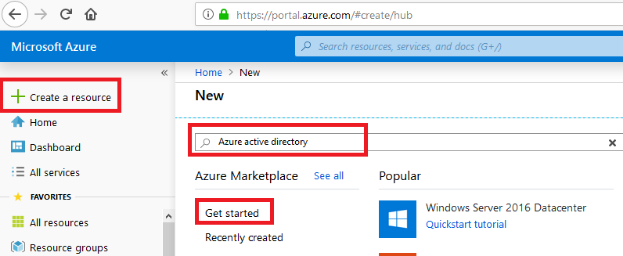
Step 1:
1. Click on Create a Resource> Get started> search box type Azure Active Directory.
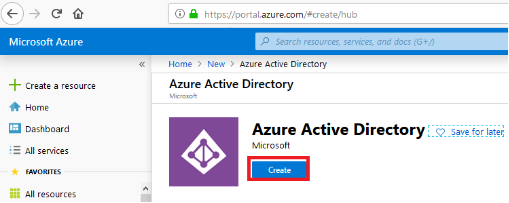
2. Click on Create.
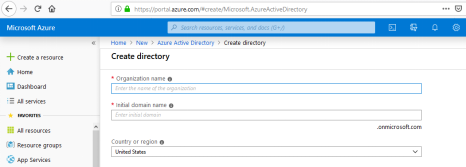
3. Type Domain Name.
4. Then Create a Global Administrator user.
5. And create another local user.
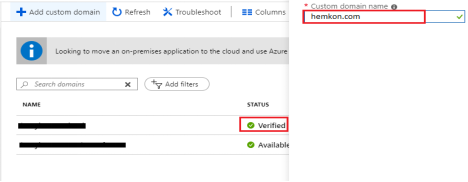
6. Now Click on Azure Active Directory- Custom domain names- Click on Add custom domain.
src=”https://www.hex64.net/wp-content/uploads/2019/09/Click-on-Add.png” alt=”Click on Add custom domain” width=”498″ height=”346″>
7. Then provide domain name then verify it from your registered domain site (like- godaddy.com, comodo.com).

Step-II
1.Now you need to configure firewall and RDP access on Azure VM (Azure-VM).
2.Click on Virtual Machine that created earlier Azure-VM.
3.Then click on Networking, click on network interface azure-vm02139.
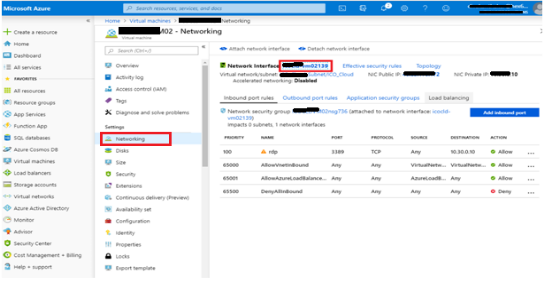
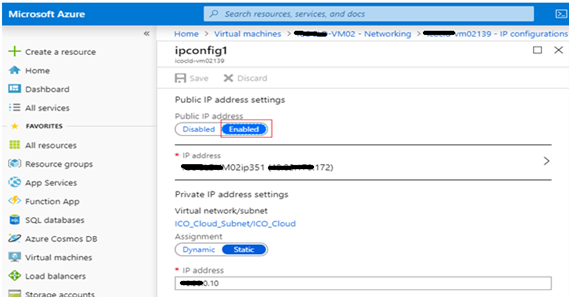
4. Click on IP configuration in left pane and then select interface ipconfig1.
Now you need to enable RDP access of VM.
1.Click on virtual machine (Azure-VM)
2.Then click on Networking then click on Add inbounds Port Button.
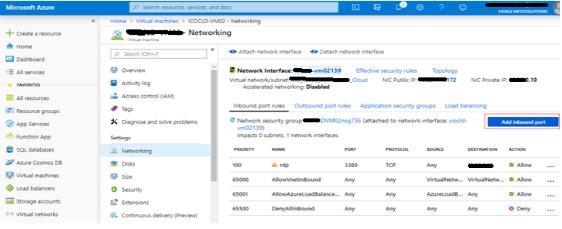
3. Then provide inbound port and IP details as mentioned below. Port 3389 in highlighted box. src=”https://www.hex64.net/wp-content/uploads/2019/09/Port-3389-in-highlighted-box.png” alt=”Port 3389 in highlighted box” width=”593″ height=”359″>
4. Now we will be able to take RDP of VM.
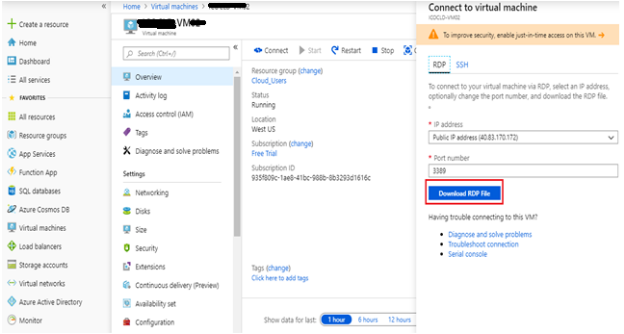
5. Select the “Virtual Machines”, which you want to connect to
Here, the Virtual Machine is already started and the status is “Running”.
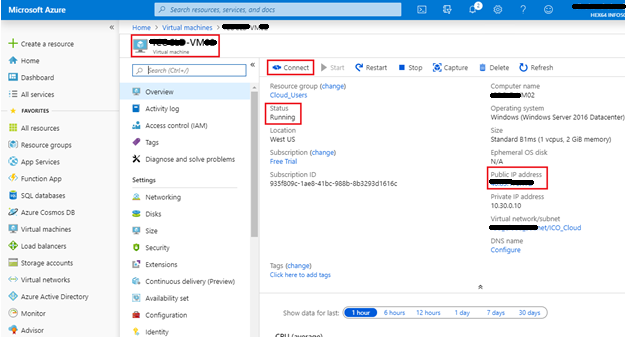
6. Click “Connect”.
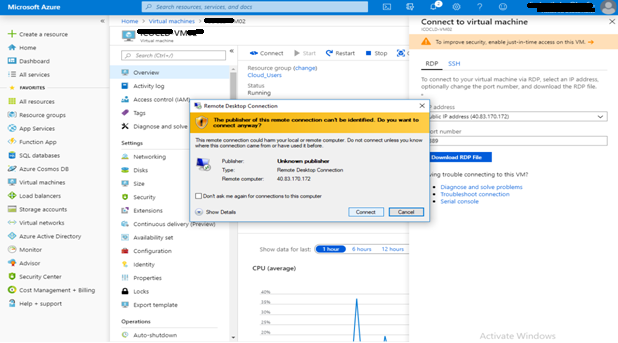
(This connection will begin “Remote Desktop Session”. The protocol used behind the connection is
Remote Desktop Protocol. Every Virtual machine in Azure is given with a “Public IP Address”. This IP address will be given automatically to the Virtual machine by Azure
7. After clicking on Connect, then click on download RDP file Click the downloaded file (VM.rdp).
8. Open downloaded file then click on Connect.
9. Provide VM username and password for connect through RDP.
Now, you have opened the Virtual Machine.
Once my Virtual Machine is created, you can use that Virtual Machine in the same way as you use any on-premise Virtual Machine.
Step-III
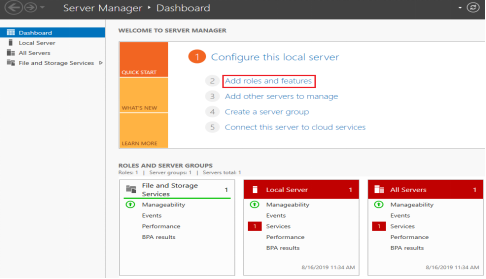
1. Active Directory installation on VM.
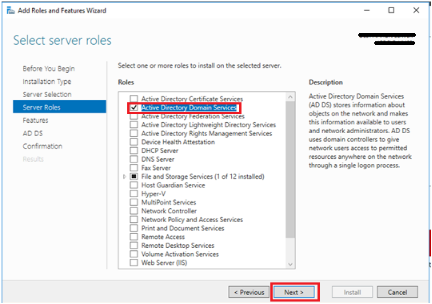
2. Click on Server Manager then click on Add Roles and Features.
a. Then click on Next.
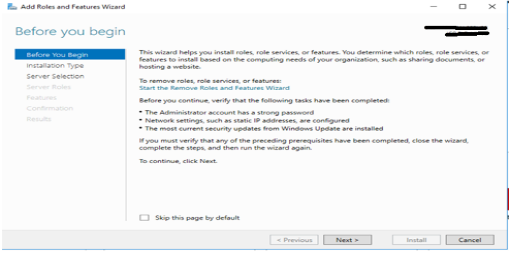
b. In this step you should add the “Active Directory Domain Services”. So, select it and click “Next”.
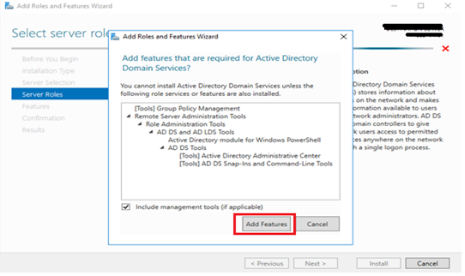
c. Then click on Add Feature command.
d. Click “Install”. This will take around 5 to 10 minutes.
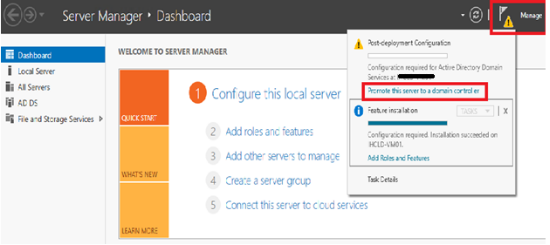
So, the installation is complete. Click on close.
e. Now, we’ll have to perform the Post Installation configuration.
Open “Warning Sign” at in the top of server manager window.
Click “Promote this server to a domain controller”.
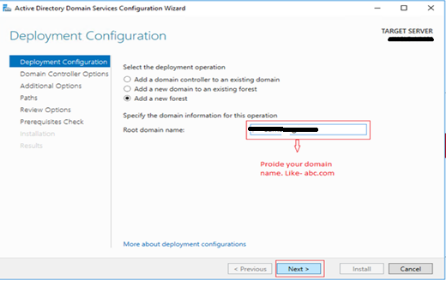
3. Here, we want to create a new forest. So, click on the “Add a new forest” and give the specified name to “Root domain name”.
4. Give the password here that is for Directory Services Restore Mode (DSRM).
This step will perform a prerequisites check. So, it’ll take some minutes.
5. After it is done, Click “Install”. This’ll again take a few minutes.
Conclusion
The configuration is done. The server will restart now. After a successful restart, the server will automatically be configured as a Domain Controller.
Step-IV
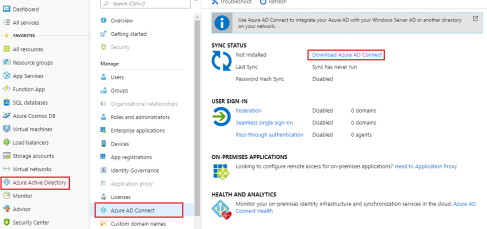
Connect Azure AD to Windows Server
6. Connect VM (Azure-VM) server and download Azure AD connect from Microsoft site and Install it on VM Server.
https://www.microsoft.com/en-us/download/details.aspx?id=47594
You can also download Azure AD connect setup from Azure Active directory portal.
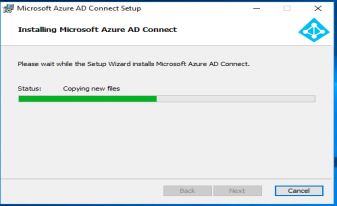
7. After downloading setup install it on server.
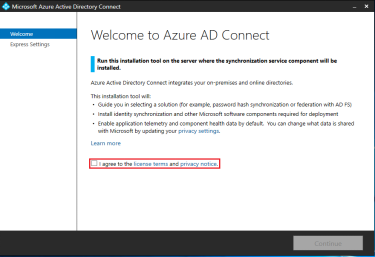
8. Click on Next and check on I agree to the service terms and privacy notice and click on con-
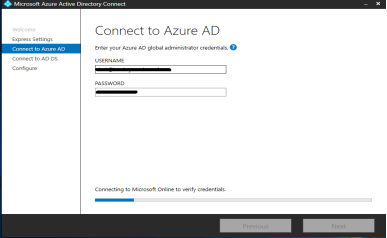
9. It will ask for Azure AD Global administrator account.
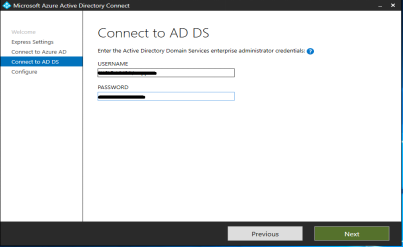
10. Then click on Next, it will ask for Domain enterprise administrator.
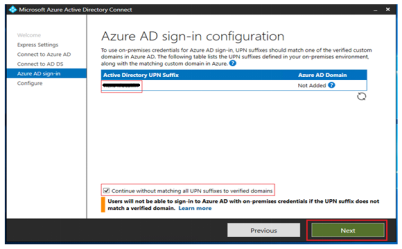
11. Click on Next button. It will open Azure AD sign-in configuration.
12. Tick mark on “configure without matching UPN suffixes to verified domains” and click on Next.
13. Click on Next. It will finish installation. It will sync your all directory data.


Wow, fantastic weblog format! How long have you ever been running a blog for? you make blogging look easy. The entire look of your site is magnificent, let alone the content
Wow, fantastic blog structure! How long have you ever been blogging for? you made blogging glance easy. The full look of your website is magnificent, as well as the content material.